Showing posts with label refashion. Show all posts

Wednesday, June 21, 2023

When Refashions Go Wrong

Way back in the spring, PatternReview was running its Sewing Bee challenge. I made it to Round 2 on the strength of my first project, a Knit Dress With A Twist. 

The challenge for Round 2 was Collars. I have lots of collars that are interesting, and lots of things I've always wanted to try. I decided to try to make a Book Dress with a Chelsea Collar that would be multi-layered to look like book pages. Well, great idea but not so great in the execution. 

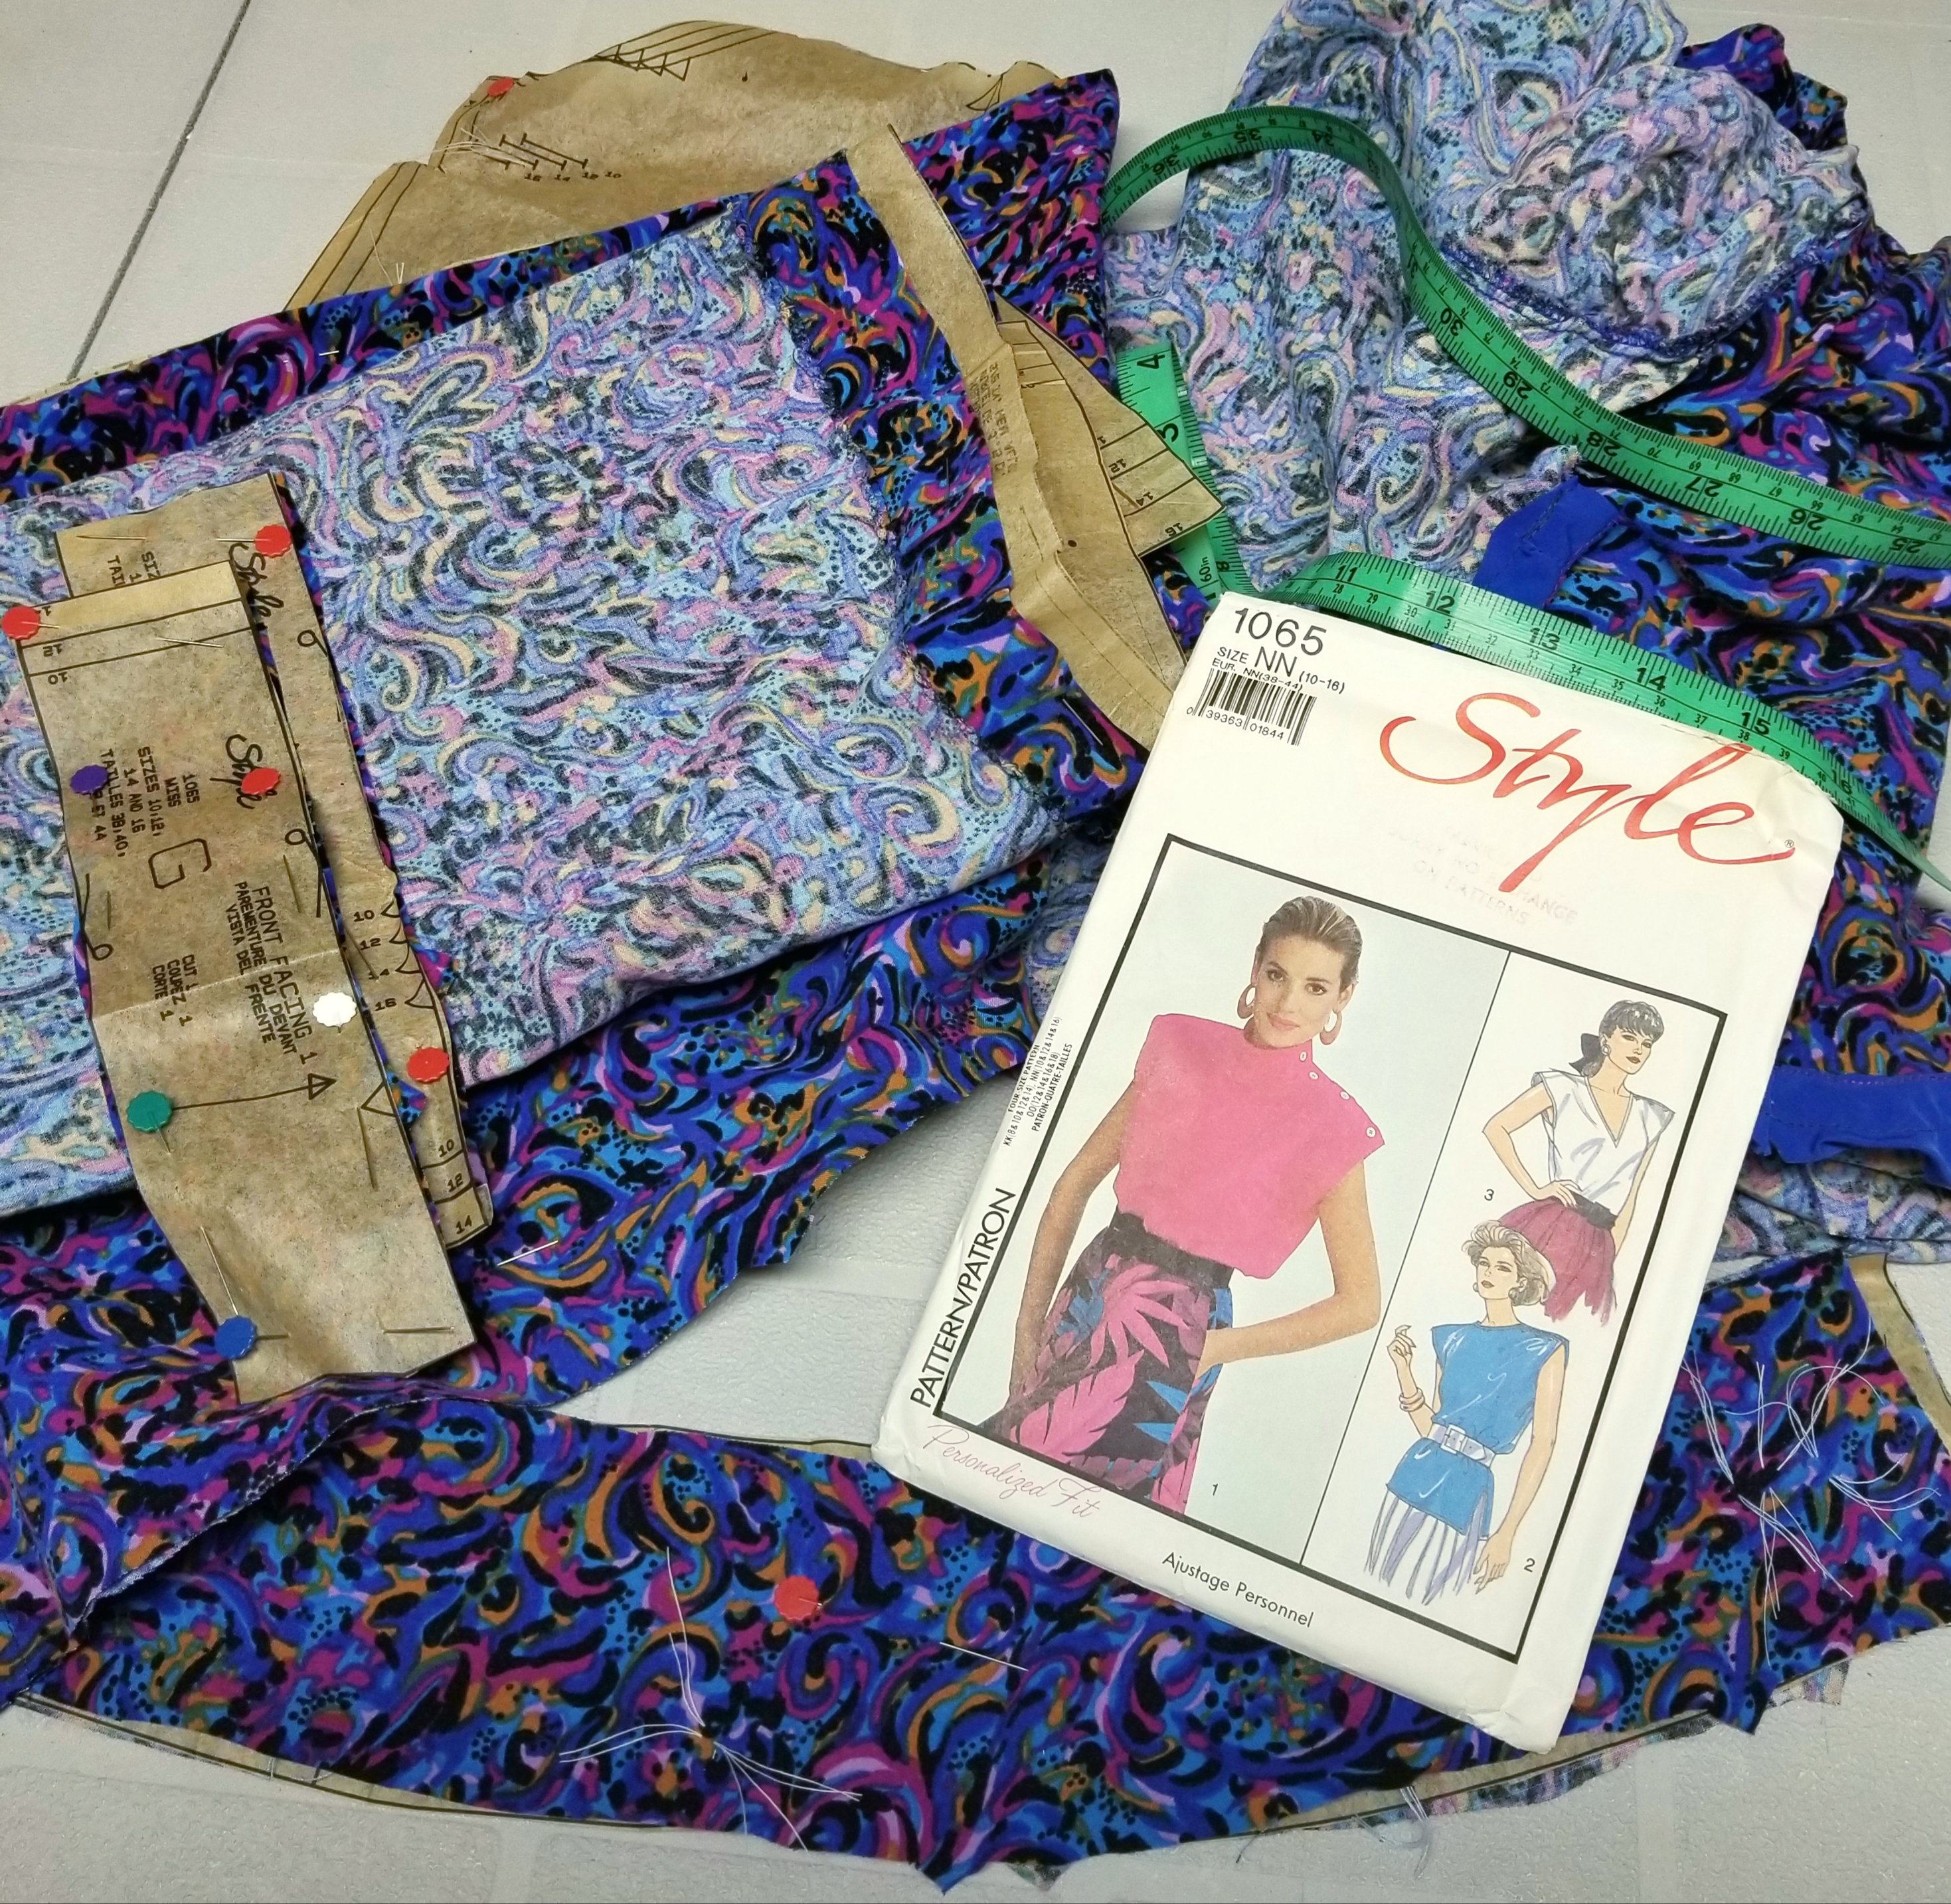
I used Simplicity 7238, a Christie Brinkley pattern from 1991. I had some good base fabric for the dress -- an old sheet, which had tones and shapes that reminded me of old book bindings. So far so good. Then I tried to create layers of sheers as "pages". So many problems! 

First off, the Chelsea collar wasn't the right choice for this concept - there was too much collar, and the sheers that I had in my stash just weren't stiff enough. I sprayed them all with spray starch and pressed but still not enough body to have the effect I wanted. Also, I caught Covid right at the beginning of collar week so was way too exhausted to do anything that might have added to the effect, like adding a text underlay, stitching with wire edges etc. I gave up and just got done what I had started so I had an entry. 

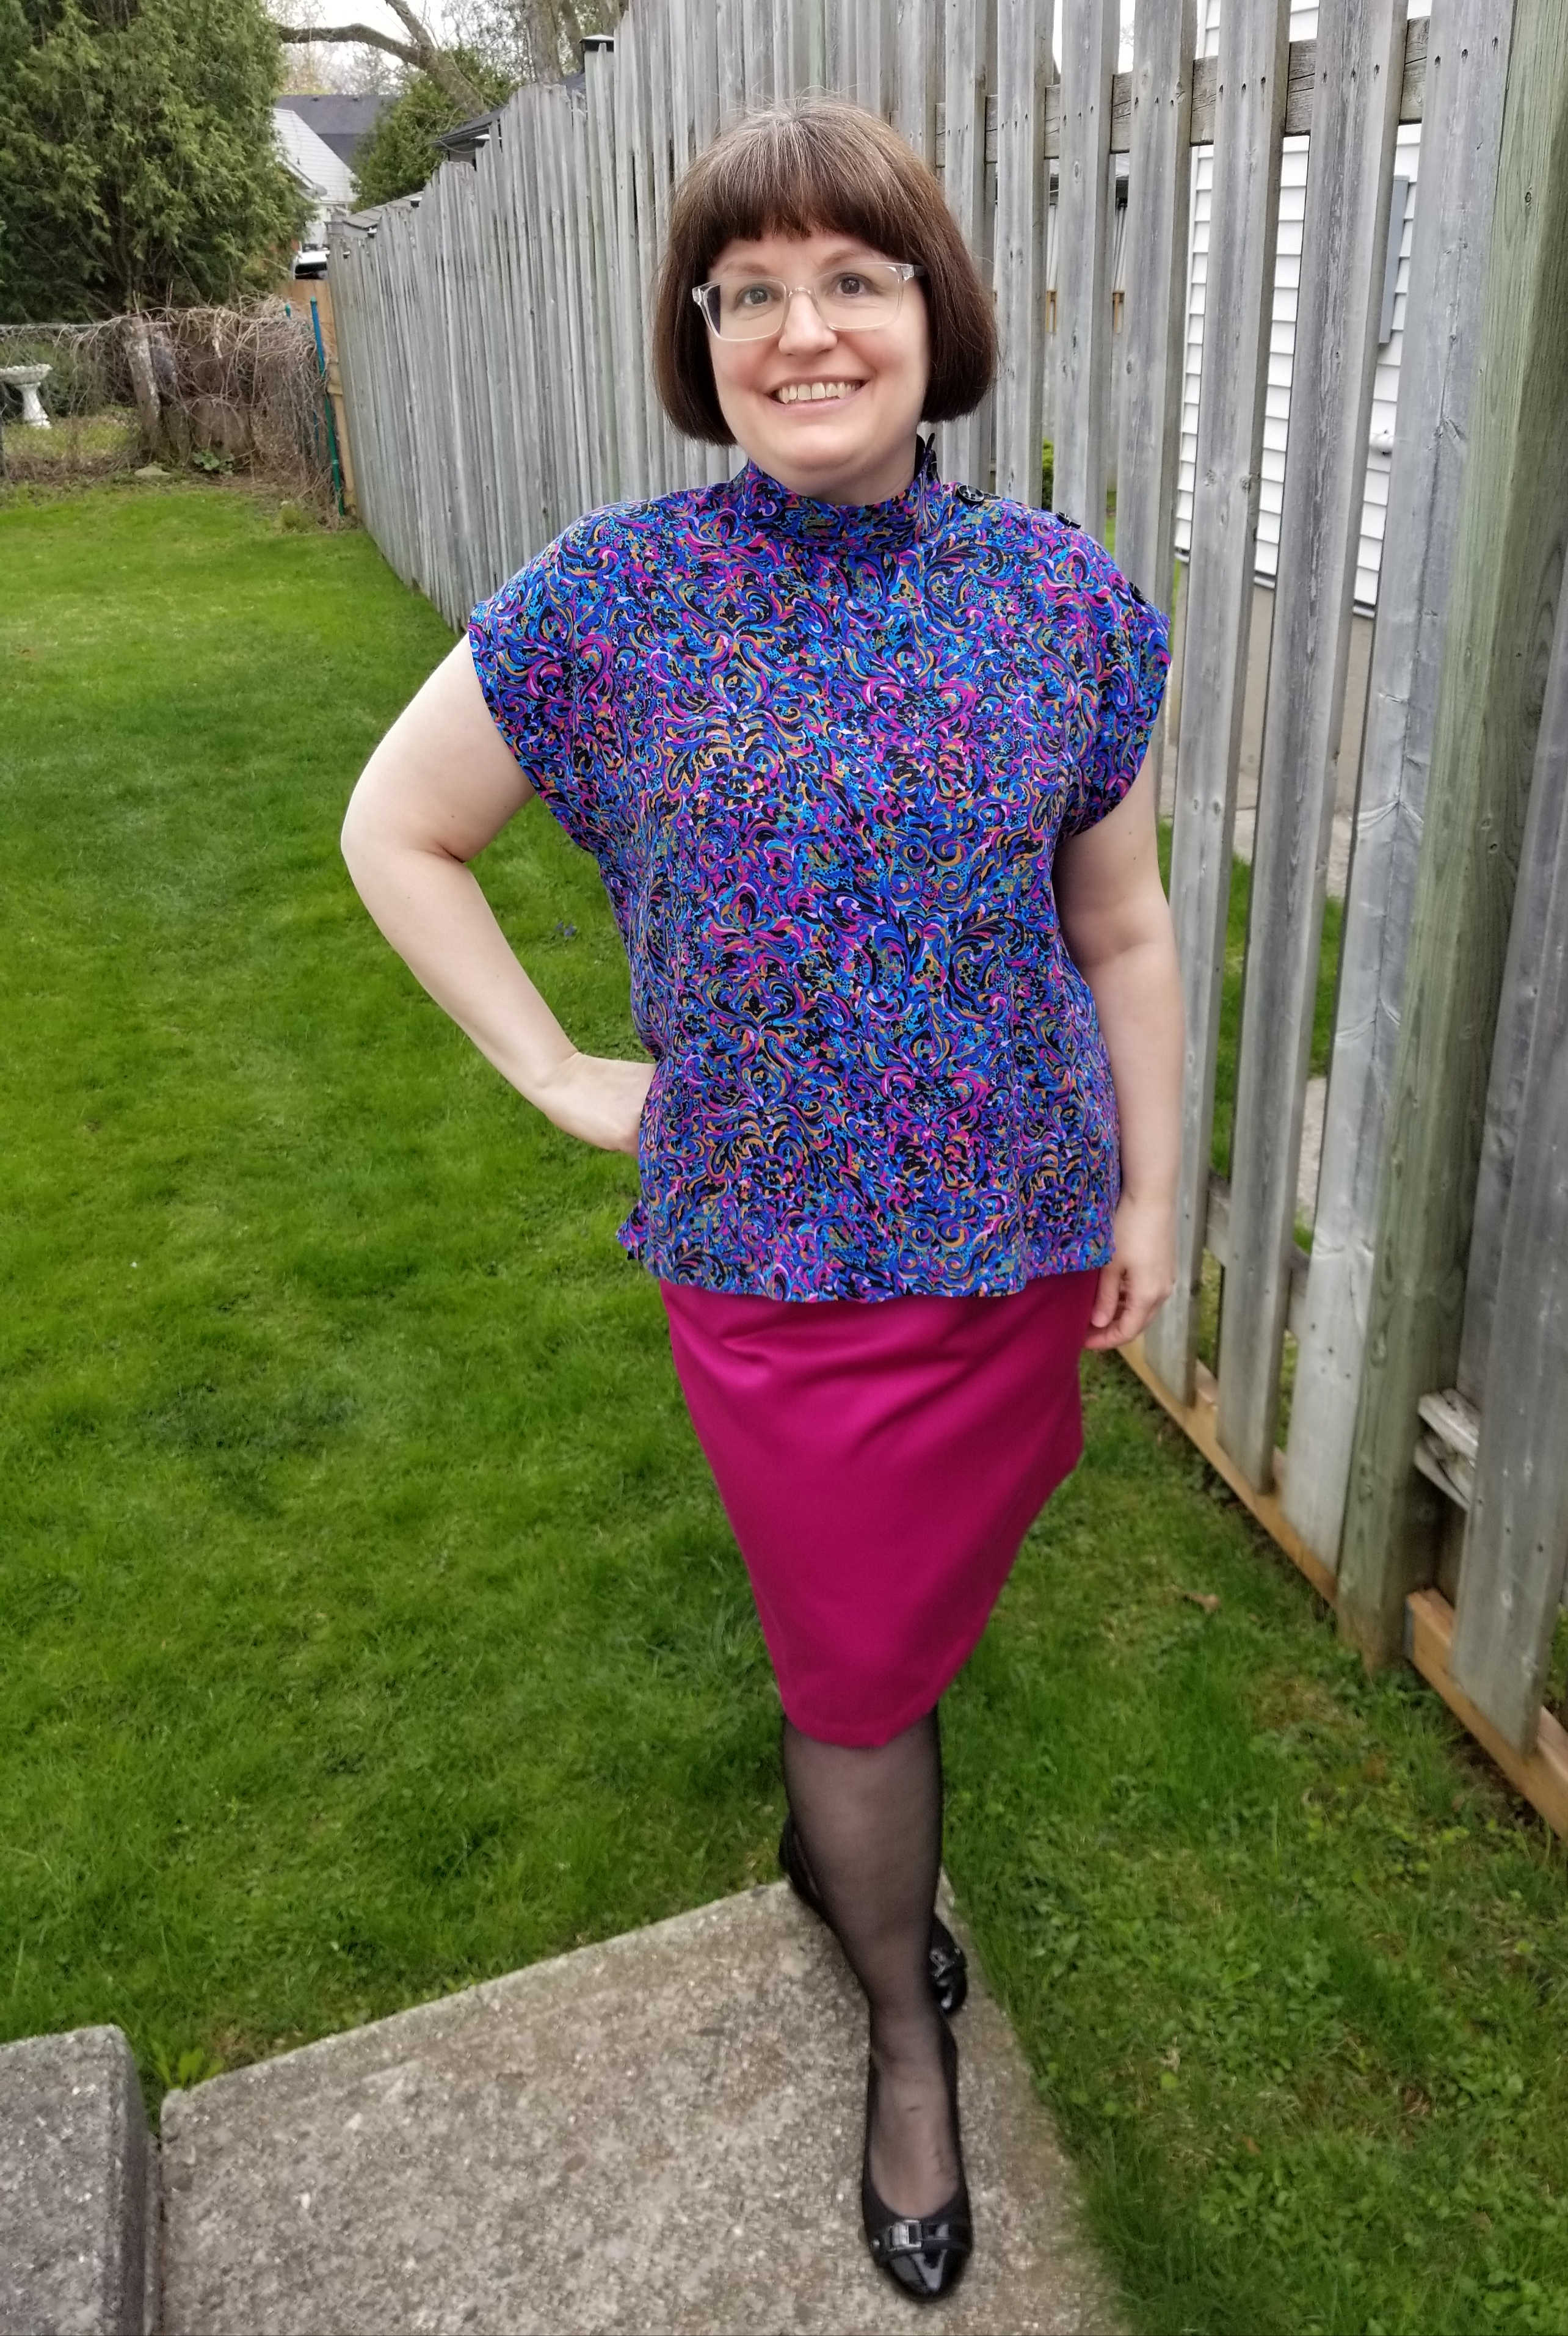
But I didn't like very much, I felt that it really didn't work for me. I put it aside thinking that maybe I could take off the sheer layers and make the dress actually wearable. I finally got to the refashion this month, and removed the sheer bits, sewing the plain collar back on. I like it much better, and think it could be wearable. But not, alas, by me. 

I don't like the shape of this dress, or the collar, or the fabric colours (why did I think I would like these colours on me?). It doesn't have any drape, and the whole outfit is just a big fail, refashion or not! 


However, the fabric is very interesting in its own right, so I'll be unpicking the zip to go back in the stash, and cutting up the dress to put into my art quilt scrap box. I can see it making a great background for something :) The joys of having non-garment sewing possibilities! 

This project was another reminder that the things I make for challenges or contests that don't already fit in with my wardrobe plans and/or colour-pattern preferences are rarely successful. I will be able to reuse this fabric, but will never get all the time back that I sunk into the project. Have you had projects like this too? I have to remind myself to be more conscious about what I'm choosing to make, in many different ways. 


Wednesday, April 26, 2023

1986 Blouse in Upcycled Rayon


This Style pattern was one I had on my wishlist to make at the beginning of this year. It all came together to convince me to make it now, as there is a blouse making challenge on IG, as well as the return of The Refashioners, AND a challenge to sew with some Viva Magenta. 


This was a perfect fit for all of that. It's a pattern from 1986 that I thrifted a while back. The price on the back for Canada is $6.75, which I think would have been a pricey pattern back in the mid-80s. And for such a simple design! The cover images look like there are some big shoulder pads in there, which I would have expected of a pattern of this vintage; however, there are none called for in the pattern. 


I used a half-made dress that I was given a few years ago. The rayon print is beautiful, and there are swirls of magenta in that print! I had first taken the bodice off and made a simple elastic waist skirt from this fabric but found I wasn't wearing it much in that form. And the print is too lovely to waste. Thankfully I had kept the bodice in my scrap bin, so I unpicked the skirt from the elastic and used that to cut the main body of the blouse. It was slightly too short on the left side of the pattern that had the button extension at the shoulder, so I ended up piecing a bit onto that side to get enough length. This print hides those extra seamlines well. 


I used part of the bodice to cut the collar pieces, and scraps from the skirt for the two small facings. There is still a little of the bodice left so I will reuse that in future! I dug through my button stash and finally decided on some plain black buttons that have a little extra with a white streak that runs through them. They were also from a big batch of random buttons given to me a few years ago. 


The blouse is a little shorter than designed (about 1/2") just because I had to fit it onto my skirt pieces. But I think it works. The front is fractionally shorter than the back but there are slits in the side seams so that's not an issue either! I cut a 14 at the neck and shoulder, and 16 the rest; however, I also added about 1/2" in width to the side seam, starting at the waist point and grading out to the hip. This shirt is basically a rectangle, so if I hadn't added that extra, it would have been too tight around my hip. 


I love this silhouette and may try one of the other views someday. The buttoned up one definitely caught my eye first, though, and I enjoyed making this simple, purely rectangular top that is a great piece for under a jacket. The original dress that I recut this from had some thin shoulder pads already covered in this fabric, so if I can find where I put them when I deconstructed this dress originally, I think I will add them in to give it just that touch more of the cover look!


Friday, June 18, 2021

McCalls 4591, Redux

In my recent post on the McCalls 4591 blouse, I mentioned a few issues I had with it. The primary problem was that the front bow was too heavy in this cotton fabric -- even though it's a lawn, it's just too heavy and stiff. Something with drape will probably work better with this pattern. As I often say when watching the Great British Sewing Bee, success often comes down to fabric choice. And this wasn't quite the right choice here! 

The other issue I have with this pattern is that the V neckline is far too low for my tastes. But if I shortened it between bust and shoulder like I often do, the seamline between top and bottom would sit right across the bust. So I had to come up with another solution.

Fortunately, there was a solution that seemed to fix both problems in one go! I untied the bow and crossed the extensions over one another, tucked inside the blouse. I pinned them down so that they formed a nice V line inside the existing neckline. Then I stitched the crossover seam down, and also across the line where the extensions crossed behind the seamline that runs across the blouse. Had to be careful to pin there so that no interior fabric was folded or bunched up at the seamline! 

After that I simply trimmed the extensions off from the inside using my pinking shears as a quick snip and finish.


It works pretty well, gathering at the front with a bit of a starburst effect, and definitely fills in the low neckline sufficiently.  I still don't think it's my favourite effort ever, but I do like this very pretty, lightweight summer fabric and think I'll probably get some wear out of it. Probably not with this skirt though, I don't think the silhouettes really go together, despite both being in my Summer Capsule plans. Oh well, learning opportunity! I still have another blouse to finish off before my Summer Capsule is done -- instead of making another pair of linen pants for the 6th piece, I've decided to go with a RTW capri that I already own and wear a lot. 

It's been an interesting exercise to try to put together a wardrobe of sorts, but I think I've confirmed to myself that I prefer dresses -- lots of one offs, and a complete outfit in one go! And that I like my sewing to be mostly mood driven. But I also always like a new learning challenge. And I have taken on another one...more on that later.

Friday, March 19, 2021

Retro upcycling: stash skirt to top


Today's project is a quick refashion -- well, sewing it up was quick, although it's been cut and in my to-sew pile for months! I had a gathered skirt that I'd bought at a thrift store YEARS ago, because I loved the fabric. But it didn't fit and the style was just too old-fashioned. So I took the waistband off, and the gathered skirt turned out to be quite a large rectangle of this lovely drapy paisley print. But even a large skirt doesn't have tons of fabric, so a sleek top it would have to be.


I had this McCalls 4632 from 1989 in the stash, and thought that View F, the sleeveless one in blue, would be perfect. I was able to fit this onto the fabric neatly, cutting the hem of the top on the hem of the skirt, so that I didn't have to redo the hem but could use the pretty ribbon-edged one that already existed. This also made the project faster. 


Putting it together was fairly easy, with a couple of adjustments for my precut pieces. I sewed up the gathers and shoulder seams, then moved on to the facings. Because the front neckline is so closely fitted, there is a slash opening in the back and there are supposed to be a couple of buttons with thread loops. I was able to find an appropriate button in my stash, after auditioning about 6 varieties. They not only had to be smallish shank buttons which matched the fabric, I had to be sure they were very lightweight as well, since this fabric is very drapy and soft. I finally went with one button only, because I had this perfect choice but only one of them! 

Then it was a simple double fold hem on the sleeve openings, and I just double folded the side seam in the hem allowance and hand tacked it down, to keep things neat and tidy. And that's it! This pattern calls for shoulder pads, which I always leave out, but the fit of this one might just need some small ones. I'm thinking of adding in some 1/4" shoulder pads to hold the sleeve out a bit -- I think it'll show off the shoulder gathers a little better. 


This one is quite long, so looks much better tucked in, I think. Because it's just a geometric shape with no darts I think I could probably even wear it backwards if I wanted a front neckline slash tunic, though ;) I enjoyed this quick refashion and am happy to save this silky fabric and make into something wearable once more. 


Tuesday, May 26, 2020

Refashioning a Favourite Frock


This weekend while going through some of my fabric stash I discovered some old clothes that I had put aside to mend or refashion someday -- and I do mean someday!


One of the dresses was a favourite of mine that I wore and wore, probably 20 years ago! I know I bought it in Montreal when I lived there in the 90s. But despite the fact that it was too small and not really in fashion anymore, I couldn't give it away. I love the crinkle stretch rayon and the print, and always thought I should do something with it. I used to wear a lot of those long full skirted dresses and they do have quite a bit of fabric in them. 

So I got it out this weekend and thought I'd probably be able to fit a top onto the skirt pieces. The sleeveless empire bodice is too small and has too many buttons and details to be able to use much of it but the skirt was perfect.


I tested out a couple of small cap sleeve top patterns to see what would fit. I finally decided on the Cap Sleeve Top from the recent book Print Pattern Sew by Jen Hewett.


While the pattern is made for a stable woven, this fabric is a bit stretchier due to the crinkle rayon it is made from. So when I cut it out, and graded out a bit at the waist to hem to give it more of a swing feel, I failed to account for the stretchiness!


It came out quite roomy. Fortunately the neckline and sleeves were fine, not very stretched out at all, but the body was quite full around the bust area. I really liked how the back fit, though, so wasn't sure I wanted to pull in the side seams in the bust area. I pinched out a couple of fish eye darts under the bust, wondering if that would work, but also wanted to be careful not to take any of the fullness out of the hip/hem area, which I really liked. As I was pinching the fabric I had a sudden idea and just brought the centres together on the front. I pinned it and then sewed one of the original dress buttons onto the join to hold it all together. I really love the effect!


And I still have 20 black buttons to use on other projects -- this dress was a motherlode of scavenged buttons -- four on the bodice front, 3 on the back, 2 spares on the inside, and a random button placket all the way down the right side seam with 12 more buttons! I am sorely in need of black buttons right now; my stash is depleted. So this was a great reuse in many ways.

I enjoyed this unexpected project and am so glad I can enjoy this pretty fabric once more. It's light and comfortable - the stretch and breathability are what I liked about it in its original shape, and the print is just so summery and lovely. I'll have to do more of this kind of thing!

Sunday, August 4, 2019

Weekend Review: Stylish Remakes


Stylish Remakes / Violette Room
Tokyo: Tuttle, c2015
94 p.
I picked this book up second hand, and am glad I didn't have to pay full price for it: there are probably only two ideas in it that I'd use. 

That's not to say it's not a good book, it is just very much aimed at a young, street savvy demographic. Most of the projects are low-sew, more aimed at fashionable upcyclers than sewists. The 'author', Violette Room, is a Japanese clothing brand, so youthful street style is their focus. The feel of this book reminds me a little of the younger, punk aesthetic of Generation T, another quick & dirty refashioning book.


If you fit into this demographic -- young, small sized -- this might be just the thing for you. The projects are a little different from those in other upcycling books, and there is a fair bit of variety in the ideas themselves. Most of the projects look similar in the photos because of the heavy use of flannel shirts and American printed tees and sweatshirts. What's with all the Americana? But the ideas could be adapted to other kinds of raw materials, to good effect.

The book features a total of 25 ideas categorized into six sections: T-shirts, Flannel Shirts, Borders (apparently striped fabric), College Sweats (sweatshirts), Gabardine Coats, and Bandannas. There are a couple of accessories in there too -- a detachable collar and a drawstring purse. Like most Japanese sewing books, the project images and brief descriptions come first, followed by all the instruction in the back.

In this book, there are no patterns -- there are drafting & remaking instructions. Your project depends on your original materials that you are attempting to upcycle. It's an inspirational book, full of ideas, and then it's up to a reader to make something out of what you have. 


I liked the idea of putting two shirts together to make one sundress, or cutting and reattaching two halves of oversized sweatshirts to make a swing top. There are sure to be a couple of ideas for readers who don't fall into the target market to make use of, at the least. Take a look at CSews and how she made a man's shirt into a cute little blouse, for an example.

This isn't one that I'd consider a must have, but taking a quick look via the library might be an option for you, and could be just that kick of inspiration that you need. 

Sunday, June 23, 2019

Weekend Review: Generation T

Generation T: 108 ways to transform a t-shirt / Megan Nicolay
NY: Workman, c2006.
258 p.
This is a book I've owned for a long time. Although published in 2006, it has a very 90s grunge/punk feel to it, reminding me of the PostPunk Kitchen blog and books of the same period.

It's a fun book for anyone who might not be an accomplished sewist, who just wants to reuse and upcycle old tees. I gave it to my teenage niece when she got interested in developing her own fashion sense and she liked it.

There are a variety of upcycling projects in here -- from shirts to skirts to bags and pillows. I have to say that many, if not most, of the designs will appeal mainly to young women, and not to the middle aged or those who prefer a more finished look to one's clothes. There's a lot of cut and tie going on.

But it's a creative spark for those interested in remaking clothing, and has some fun ideas that can be adapted into something more to a reader's taste if the original doesn't appeal. I have a feeling that this would be a hit for a craft group, or for people wanting to do something a little different. These days most of these kind of t-shirt projects can be found online, but I think this book still has enough interest to be a fun and quirky read.

I really can't say that this is a staple for me as a sewer, but I have kept it for over a decade so there is something there that appeals! If you like a free-wheeling, non-patterned compilation of upcycling ideas, you might like this book. There is a second book as well, but I find that the projects in that one are reaching -- this book kind of reaches the limit of practical or usable ideas for me.

Definitely something to appeal to the newbie or the young person interested in tackling their excess fast fashion and learning sewing basics at the same time.


*************************

For a recent post in which I talk about t-shirt refashioning and share more links, check out this discussion about scarf making with old tees! 

Friday, June 7, 2019

Harmonious Upcycling


This week I followed up my recent pattern tracing marathon with a bit of pattern cutting! I cut out three tops, and spent this week working on this one, the Harmony Blouse from Love Notions. 


This was a particularly thrifty sew; I am on the Love Notions fb page and watch for her weekly sales. A few weeks ago this blouse was on sale for $5, and since I've made & loved the Love Notions Margot Peplum top, I thought I'd give this one a go as well.

It's also a thrifty make because I used a thrift store April Cornell dress as my source material. I picked up this large and outdated style of dress over a year ago just because the fabric was so beautiful, and have been trying to find the perfect pattern for it. This top was just the right shape to take advantage of the dress fabric.


I started by cutting the skirt off just under the funny wiggly waistline, then cut the seams out so I had two rather trapezoidal chunks of fabric. I cut front and back from these pieces. Then I used the bodice pieces to cut the cap sleeve option. I could have used the short sleeve option (slightly longer) but there were double darts in the bodice, front and back, that I would have had in the sleeve hems so opted for the shorter length to make it easier.


I was even able to reuse the button back closure from the original dress as my new button back closure. I just picked out the stitches for the loop and button, and reattached them to my new top! I also used a 50¢ vintage packet of cream coloured nylon bias tape to finish the neckline. It's very lightweight and slightly silky, and worked perfectly.


Pattern alterations:

As for the pattern itself, I love it. It fits beautifully. I fall between the Med & Large on these patterns, so I traced it off between those lines at the neck to just below the bust where I graded out the large pattern line. I also traced a halfway line between M/L for the sleeves. It fits just right.


A touch windy here, thus the wrinkly bits - it does fall nicely in back usually!
Next time I'll take a touch out horizontally at the level of the back slit; I always seem to get a little bubble of excess on this style of top right at the upper back, which I'd forgotten from the last time I made something similar. And I'll probably make the back swoop a little less prominent; hi-lo isn't my favourite look and I didn't realize it would be quite so different -- perhaps I made a little boo boo while tracing, or it's just my shape. In any case, I will retrace the back bottom to be a much shallower curve next time around.


I really enjoyed the challenge of making this and it's been a comfy wear so far today! I recommend getting on to the mailing lists and/or FB pages of designers you like and waiting for sales or promotions, if you need to save money while sewing. It's a way to stretch the sewing budget. I also check thrift stores for fabric and reusable clothing often, and note when thrift stores are having sales or if there is a special senior's discount day we can take advantage of, or other options like that. It keeps me sewing and keeps my budget in line.