Friday, September 5, 2025
Upcycling to Reuse a pretty Rayon!
Tuesday, July 22, 2025
Sewing paper - recycled books to be exact!
I have a new test project underway -- I am trying to sew together some recycled paper circles! This is an idea I had for my workplace, to create a backdrop for an event. I think I'll have to sew together a lot of these to get there. Maybe I'll just make a garland!
To get these circles, I used some discarded paperbacks from our collection, all with the same kind of paper but slightly different fonts and sizes of type, for variety. I tried to avoid anything that would have explicit language on it, also! I then used the large button punch from our makerspace. It is a manual punch so I could only do a few at a time before my hand hurt. Thankfully some of my coworkers took turns and so between us we got quite a few ready.
How did the sewing go? Well...much easier than I'd anticipated! I used some old needles that I save for just this kind of thing, and used up some of my partial spools of random beige/cream threads. Sewing on air is actually simpler than I'd thought it might be. I made piles of 25 circles, then started by sewing a lead in -- held the threads behind the foot and sewed a few stitches, then fed in the first circle. I just kept feeding them, leaving a few air stitches between each one. Then I tied off the threads after the final circle.
Friday, May 16, 2025
Terrace Top for the Literary Sewing Circle
I had a bunch of ideas for my project for the Literary Sewing Circle this round. I decided to make this quick one to start with.
I have made a few Terrace dresses by Liesl & Co and have always wanted to make a top version. I had this very soft vintage tablecloth in a bright yellow floral that reminded me of the marigolds that Violet and Bliss planted around the sign for the Purple Barn. So I decided to use it!
I feel like it fits the book both because of the marigold link and because it's upcycled-- it looks like a 70s piece that could have been for sale at the Purple Barn!
I cut this to a top length but otherwise just followed my regular process from the 3 previous Terraces I've made. However, I was sewing late at night so made a few rookie errors! I sewed it with a 5/8" seam allowance when it should have been 3/8" - but thankfully it still fits! I raised the neckline a bit so I could fit the entire flower in but I think it's a bit high. I may go back in and cut it down again, or I may not.
Anyhow this is a bright Dopamine Dressing top that I'm going to enjoy wearing. The 70s vibe goes well with my jean skirt, too!
Tuesday, April 8, 2025
Sew Frugal with the Milou free dress pattern
This is a project I made for a number of reasons - a few online challenges, and the desire for a new spring dress in a nice yellow!
I was inspired by the #SewFrugal challenge on IG, always a fun one; you are asked to make something from a free pattern using fabric from your stash. Add to this the "Mellow March" theme from MAGAM, also on IG, and a PatternReview contest, and I was inspired.
I decided to try the free Milou Dress by Fabrics-Store.com. The loose fit, but with inset gathers on front and back, looked fun to me. I had a lightweight yellow cotton-poly sheet in my stash that I thrifted a few years ago, and thought it was the perfect match.
I enjoyed making this, although with a free pattern you often do get what you pay for. I found this one pretty good overall, with one major exception. The neckline is tiny, and I mean just under 20", when the average woman's head is 21-22". Mine, however, is a large head - I have a gargantuan cranium! So it was particularly impossible to fit this over my head, which is important in a pull on dress! Luckily, it is a neckline with just a bias facing, so it was very easy to enlarge the neck opening and bind it appropriately. Of course if you wanted to keep a higher, tighter neckline you could always add a back slit in the neckline and face it.
Another slight complaint is that there were no tips in the instructions on how to get a clean corner on the insets. I looked up a tutorial on Youtube to remind me. There were links to a few other techniques in the instructions, including one on how to add side seam pockets. I did this of course!
Otherwise it was a pretty good project. I do find that the sleeve is a bit wide at the hem, I'm not sure I like the straight line all the way down. I do like the sleeve rolled up, but I am thinking of going back and narrowing the sleeve down toward the hem a bit. I also added 2" of length but I could cut that to 1.5" if I make this again, as I ended up taking a deeper hem than my usual.One of the challenges in the PatternReview contest was to make a basic solid coloured dress and style it for day and night. I had fun with those photos, but do think I'll likely wear this most in the day verson. I consider yellow a basic in my wardrobe! This was a fun make despite the small issues that cropped up, which were all easily fixable. I like the finished pattern - the original was colour blocked (very subtley, in white and cream linen) so that's always an option, too, but I love my solid colour version that I think shows off the main feature of the pattern, those inset gathers.
 |
| Evening look! |
Tuesday, February 11, 2025
Dust covers for the closet
After finishing my recent boxer short project using Butterick 5027 I was looking at the pattern, a real combo of options. I noticed that there was a pattern for a hanger cover included, and thought this might be a useful addition to my closet.
I made a few samples from some old sheets in my stash; the first one followed the pattern, but I added a 1" band between the front and back pieces to give it a little more width. This is designed to be a close fitting hanger cover, lined with batting, to hang your clothes over, possibly to avoid wire hanger marks? Well anyhow, it wasn't quite what I had in mind. I didn't use batting as I was just testing it. And then I made a number of changes.
 |
| First try |
 |
| Second try: not quite right yet! |
Because I was using sheets, on some of these I just used the deep sheet hem for the edges of the main pieces. Then I just made a quick hem on the bands before attaching them. This is a fiddly home decor project but it is something I need in my house and I am happy to have finally figured out a way to do it! I think I might make a couple more from the rest of the sheet that I used and then should have enough - just a couple for the more rarely worn items. I spent a lot of time in January making unusual (for me) projects! Onward to some garments in February.
Friday, December 13, 2024
Making over Knit Dresses
As some long-term readers might know, one of my favourite knit patterns is Kwik Sew 3559, an older OOP pattern that I've made 10+ times. Two of my 3559 dress versions haven't been worn much, so I decided to remake them into tee length tops instead. I really need more comfy tees, and these were easy fixes.
The first was a plain black short sleeved version. I never wore this, as I had added a band on the bottom to get it to the right length, and somehow it just didn't sit right. The hem curled up after a couple of wears and I just couldn't sort it. Perfect candidate for a chop! I sewed the pocket openngs shut from the inside & then cut off the pocket bags. This one I cut to a high hip tee length, and just ironed on some knit interfacing to keep the hem smooth, I didn't sew it at all. Quick and easy, and will mostly be worn under a cardigan or jacket anyhow.
The second one was a little bit fussier. This knit is really lightweight and springy, which is why it never worked well as a dress. I wore it a couple of times, but I found that once I put the sash on, the back of it clung to my bottom more than I liked. Also it is a bit static which doesn't help. So I wasn't reaching for it often, but I love the pretty fabric and how soft it is to wear. I thought if I made it over into a tunic, I wouldn't be tying it around my waist and the fabric could fall more naturally. So I did the same with the pockets - sewed the seam shut and then cut off the pocket bags. I then measured down from the yoke and cut this one a bit longer than the black one. I also added hem tape to the bottom of this.
I then took the 9" that I cut off and sewed into a tube for a quick infinity style scarf that I can add to this if I want a little extra coverage or just a different look. This was fun to do and I'm glad I could use the fabric for another piece. I think I will get a lot more wear out of this tunic version!
Tuesday, September 17, 2024
Hot Pink Upcycled 90s Dress!
I had to cut the length somewhere between their long and short to get the perfect longer skirt look for me. Of course I added some side seam pockets as well. I did shorten it an whole inch above the waist, and I cut the shoulders at 14 and the rest at 16, giving myself a smidge extra at the hips. The only thing I would change if I make it again is to take a little sway back adjustment to deal with a bit of extra fabric at my lower back. Otherwise I love the fit and feel of this - the sleeve is great, the V isn't too low, and it's comfy.
And I was thrilled that the perfect buttons were in my button box - I wasn't sure what to use with this fabric until I saw these. I bought them at my local Fabricland some time ago with another project in mind, but am so glad I never used them because they are just right for this fabric! The only issue I had sewing this dress was that the bright fabric made me see spots if I didn't look up to rest my eyes often enough. It's so nice to have a problem free sew once in a while!
Tuesday, April 23, 2024
Burda Knot Front top
PatternReview is running an upcycling contest this month, and that gave me the push to try a project I've been thinking of for a while. I received quite a bit of fabric, including a few finished projects, from a friend a year or two ago. One item was a gorgeous blue shift dress in a linen/cotton or rayon blend, I think - anyhow it's beautiful. I tried just fiddling with it a bit to see if I could make it fit me but it never worked. The neckline & shoulders were just too big, and the hip area too small.
So I took the plunge and cut it up! I laid out a few simple tops but found that this Burda top (109-08-2021) worked best with the available fabric. Plus it has this very cute knot feature at the neckline, which I have wanted to try for a while now!
I cut everything out except for the armhole facings; I ran out of enough fabric to cut these longish pieces. I could have pieced the remaining bits and probably had enough, but didn't want a bunch of seams on the arm facings, might be uncomfortable. I looked through my stash of vintage bias binding and found one pack of a perfect blue. So the armholes are finished with binding instead!
Another change I made was to cut the back piece across the existing back seam of the dress. There is a back neck slit in the pattern but I sewed together the neck facing and tested it to see if I could get it over my head without unpicking the back piece to get an opening. It fit very easily. So I didn't put it the back slit. I always hate that fiddly button loop anyhow, haha.
I cut this in my usual Burda size, 42 at the neck and 44 at the hip. There is not much leftover scrap fabric from this one, and I'm so pleased that I can wear this glorious fabric now. It will be a great piece for summer days!
Tuesday, October 31, 2023
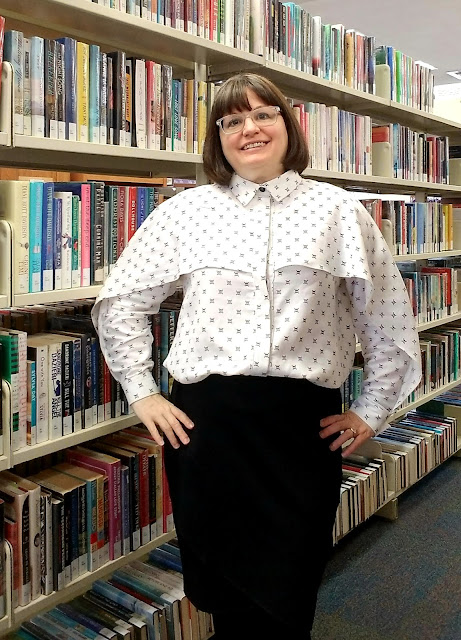
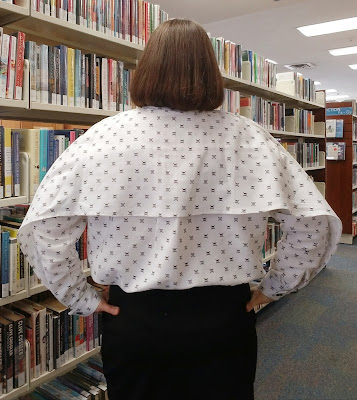
I AM Barbara in Skull & Crossbones
I've had this project in mind for a few months, and with a weekend of intense sewing, managed to get it made in time for my Halloween workwear!
The I AM Barbara blouse caught my eye a while back - I don't have anything like it; it was the flounces that interested me. I like the ones with the least flounce to them, and thought that this fabric was a perfect match to this design. I bought it with this project in mind, and happily it all came together just as nicely as I'd imagined in my head!
The fabric was originally a 100% cotton IKEA sheet, which I bought at the Goodwill. When I saw it, it looked like a repeated print in black & white, which fits into my wardrobe parameters. But when I looked a little closer, I saw that it is tiny skull & crossbones. How delightful!
And, the fabric is very soft and light, so I thought that a double layer, like in the Barbara blouse, would work well with it. It wouldn't be too bulky, and it would also be a bit more wearable if two layers make it a tiny bit less transclucent.
I really enjoyed sewing this, even if I was pushing myself to finish it. The instructions were clear, even with some fussy bits like the front hidden placket piece.
I ended up not doing it perfectly but close enough to wear and be functional - that's all I ask! I also made a small boo-boo on one cuff, which buttons the opposite way to the other, but that's easily fixable but removing and replacing that cuff. I will do that at some point ;)
I cut a 42/44 with a little more width at the hip/hem. And I had to shorten the sleeve by 5/8", which meant also shortening the flounces. I didn't take any length off the body of the blouse, in fact I added 1/2" to the bottom to give me more hem allowance. I think that it's just right.
I used flat black buttons for the placket, but used 4 hole buttons for the collar and cuffs (the visible buttons) so that I could stitch them on in an X pattern using white thread, to echo the print. I really love everything about this!
The fabric is so soft to wear, and works really well with this design. The only slight drawback is that it needs a lot of pressing! I love it and am so glad I pushed to get it done. This is an interesting design that I enjoyed making, and I also love the fabric a lot.


