Tuesday, May 31, 2022

A 1986 Remake: Star Terrell's Two Minute Dress, resurrected


PatternReview ran a "Retro" contest for the month of May -- the challenge was to take inspiration from any style pre-2000 and recreate it for today. Not as costume, but as wearable modern outfit. **Update: voting is now open at Patternreview if you're a member & want to vote for me 😁

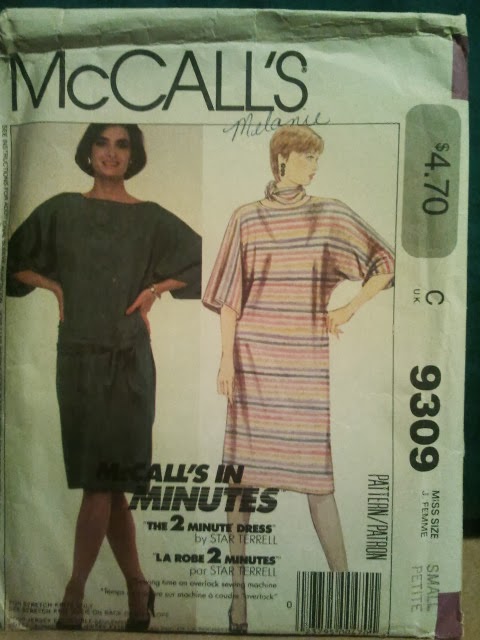
Well, I immediately thought of a project I've been considering for quite some time. My first pattern I ever bought was this McCalls 9309 (©1984) for my home ec. project in Grade 9. I still own it, and have been thinking about remaking it to current sizing standards ;) I finally got around to it. 

The lady on the right has my Grade 9 haircut ;) 
The one on the left has my current haircut! 

I had made it in the 80s in a soft t-shirt jersey in a mint & white tie dye. To modernize it, I chose a heavier blue and yellow print in my stash, which has a slightly sturdier hand than the original and a more current appearance; I'd pulled it out as part of my blue and yellow Spring sewing plans. I had just enough to cut out the dress and sash - I decided to cut two sash pieces and sew them together so that the unprinted back of my fabric isn't showing when I tie it. Fortunately I could squeeze that all on with a centre seam in the sash rather than cutting on a fold. 


The other major change I made to this dress was the sizing. I did make this originally when I was thirteen, after all! The pattern piece for the body is just one full piece, the same for front and back. It made it easier to pin the whole thing to my shoulder seams to see if the neckline and sleeve would still work in the size 10/12 pattern. Because this is so very 80s oversize, it did; but the waist/hipline was a different story. 80s fashion also liked to have loose tops and fitted bottoms, but I am the opposite shape to this trend. So I traced the main pattern piece as a half pattern to cut on the fold, and added 1.5" to the hip, then smoothed out a curved line to just above the waist marking. Yes, I had to add nearly 6" to the diameter of the hips! 

One neat element of this pattern is that you sew a hook to the inner sleeve along the upper seam, just about at the bicep level. Then you make a thread loop at the inner sleeve hem, so that if you want to change the look to have short sleeves you can just hook them up on the inside and voila. A different look!

Since I'd already made some biggish changes I also decided to pop in some pockets. I stole both the pocket and neckline finish from my Marcy Tilton 9329 -- the pockets are just one piece and stitched to the front of the dress, while the neckline facing is topstitched down 1" from the neckline. Both of these additions were really useful ones.

I think that the rejigging of this pattern worked well! And the trip down memory lane was a treat. I was sure I still had a photo of myself in the original, but all I could find was a group photo from my Grade 9 Grad. You can see most of the dress ;)

This was an enjoyable project that the PatternReview contest gave me the push to actually get done. You can probably pop on over to PR and vote for me in the next few days ;) In any case, I love the dress and feel that it modernized effectively.

Channelling the 80s inspiration with two of my fave albums from the mid-80s:
Jane Siberry & Howard Jones


Sunday, May 29, 2022

Weekend Review: Making Bombs for Hitler


Making Bombs for Hitler / Marsha Forchuk Skrypuch
TO: Scholastic, c2012
186 p.


This middle grade novel is a companion to Skrypuch's earlier novel, Stolen Child. This one follows the elder sister of this Ukrainian family that is broken up when Nazis kidnap children in WWII. Lida pretends she's 13, even she is small, knowing that if the Nazi work camp doesn't find her useful for work she'll have a worse fate ahead. Thanks to her cleverness in speaking up about a loose button on an officer's jacket, she is assigned to the laundry, where she performs back-breaking washing and ironing, and is then put to work mending sheets and clothing. Her sewing skills are eventually praised by the head laundress, and her sewing keeps her safe for quite a while. 

However, her quick seamstress hands lead her to a new role alongside a few other girls; they are reassigned to work in a munitions factory, assembling bombs. The descriptions of their daily life and routine are horrifying but well-known to anyone who has read WWII fiction or non-fiction. Lida and her fellow bomb makers decide that they will sabotage the bombs, ruining the gunpowder so that the bombs won't explode on use -- even though they could easily be caught doing this and that would be their death sentence. These scenes draw from the true story of Jewish slave labourers in Czechoslovakia,  who removed the charges from Nazi ammunition and left a note instead, found when a British plane was shot at but wasn't destroyed.

Eventually their munitions factory comes under fire itself, and Lida is sent to another work assignment on a farm where they are starved and cold; but then they are freed by the American forces. During all this time, Lida can't stop wondering about her younger sister Larissa (of The Stolen Child) and what might have happened to her.

This is well written, thoroughly researched, and emotionally compelling, while also pitched just right for the juvenile audience. Skrypuch is really good at these kinds of stories, and this one caught my eye because of the role of sewing in keeping Lida alive. But it's also a powerful story of war and survival, pinning both the Nazis and the Soviets down for their horrific actions. It's timely again, sadly enough. 


Friday, May 27, 2022

Pivoine Blouse for the Literary Sewing Circle

When I was thinking about projects for this round of the Literary Sewing Circle, I kept coming back to the Pivoine Blouse by Delphine & Morrissette.

I have owned this blouse pattern for quite a while and always intended to make one, so now is the time. As I said in an inspiration post, Pivoine is French for Peony, so we are nodding both to Peony the cat and to Miss Judson's French background with this pattern. The fabric I chose is an alphabetical novelty print (actually a sheet originally), so it is also reflective of the entire writing world, I'd say.

There are many versions of this blouse in many fabrics, but I thought that this crisp polycotton would give a boxier look to the blouse - which I wanted. I had just enough left from a previous project using this sheet to fit all the pieces of this blouse pattern onto. I wanted to be sure that the letters ran across the top evenly, on the same plane, and that the cuffs were also vertical (which necessitated cutting them on the cross grain). 

This pattern is all in French, and while my French is basic, I only had to search a few words and instructions on Google Translate to be sure I was doing things correctly. There is a good photo laden blog post about the construction of this blouse on Delphine & Morrissette's site, which was also helpful, mostly to be sure I was getting the seam allowances right and doing things in a good order. 

Otherwise I just depended on my sewing experience to help me along. This was actually quite an easy sew, not many tricky bits at all. I used my trusty 1/4" quilting foot to help me get even edgestitching on the button placket and collar band. Then I searched through all 5 of my button tins to try to find a good match for this fabric. I had a basic white shirt button in mind, but when I saw all of my random one-off buttons that just seemed to match the colours in the fabric so well, I made a decision to use multicolour buttons. They are all nearly the same size, so I just made all the buttonholes based on the mid-sized one (the largest was infinitesimally bigger, and the smallest just a hair smaller) and that worked out okay. I worked out my own button placement so I ended up using 8 buttons rather than the 7 called for in the pattern.

I am really pleased with the cute summer feel of this blouse, and I do love a good alphabet print. This is light and floaty and goes with a lot in my wardrobe. I think I'd make this blouse again, maybe in a drapier fabric for a really different look. I enjoyed sewing this while thinking about Myrtle's adventures in Premeditated Myrtle and all the following titles in the series. I hope everyone else participating in this round of the Literary Sewing Circle also enjoyed both the reading and the sewing! 


Tuesday, May 24, 2022

Novelty Scrap Busting!

I have a tip for all you scrap busters out there -- check with your local library and/or early education teachers to see if they have a use for your scraps. My coworker who runs children's programs recently asked me if I had any fabric scraps with varied textures for a learning module she's creating. The key was texture -- the children would be feeling the fabric and sharing their experiences, even comparing it to things outdoors during outdoor programs as well. 

Well. Do I have any scraps? This request took on a fun journey through my remnant bins, where I found lots of silky lining and rayons, crisp cottons, canvas, rougher linens, varied wales of corduroy, velour, burnout velvet, fleece, felt, wool, jacquards, cotton gauze, seersucker, scuba, soft stretchy jerseys, metallic knits, suitings, ultrasuede, and more. I cut a block of each one, in varying sizes depending on my remnant, but big enough to run through the hands and get a good sense of the tactile nature of each. 

I used my pinking sheers to trim some of the more prone-to-fraying bits, but overall they weren't hard to gather and sort. And they can be thrown into a lingerie bag to be washed when necessary. If there are some that fray away she can ask me for more ;) 

It was a fun exercise, as I saw bits from my many previous projects, and even discovered quite large remnants of a few fabrics that I'm now planning to make some summer tops from! I was able to create two baggies of exactly the same bits so that they can be used by multiple families. This was an unexpected request that cleared nearly a shopping bag full of small scraps from my stashes and got me to organize a bit too. Definitely a new and useful life for some of my remnants.


Sunday, May 22, 2022

Weekend Review: Love the Great Ruler


Love, the great ruler / Valentyn Moisenko
Kyiv: Double A Publishing, c2015.
137 p.

This is a little book I found thanks to my library's online collection. It examines and explains the sources and meanings of a handful of the most frequent embroidered symbols used for clothing in Ukraine -- as noted in the subtitle! It does cover just a few, but goes into them in great depth. There is a hint of this history discussed in the intro to The Art of Ukrainian Embroidery as well, mentioning folklore and myth. But this book goes much more into that history.

The book examines four main motifs, what he names as the Cross, Rake, Cossack, and Berehynia-Rozhanytsya (mother). The first three are mainly male, while the Berehynia is obviously the female principle. There is discussion of the roots of these symbols, and the beliefs that gave rise the them. Berehynia has always been one of my favourites and there is a good discussion of the female goddess with arms upraised that is found way back in Trypillian art, and how that image transmogrifies in to a more abstract version of a V with a dot or square above the open end. There are also tons of clear, close-up images of embroidered clothing to illustrate each discussion -- this makes it much easier to clarify what images and symbols he's referring to, and how they show up in modern embroidery. The rake & cossack are images that are much more spiky and linear, and the cross shows up in different ways - a long cross is apparently more masculine, and the solar cross (even arms, in a circle) more feminine. 

This author is a bit mystical for my tastes, being very attached to the male and female principles of symbols and myth. There is a section where he states that the symbol of the cross is used differently in men's and women's clothing, since "the main earthly mission of a woman is to give birth". Well, this might be so in a general mythological perspective but as a comment situated in the modern world, I strongly disagree with it and all that it implies. If you consider these kinds of references as more of a general mystical statement and not rooted in reality today, you can overlook it. It did make me take this book less seriously though. 

Still as an overview of the development of symbolism in Ukrainian embroidery, and the power of these symbols in the tradition of embroidered clothing, this book is really thorough. At least in discussing these four main symbols and their permutations. I enjoyed the focus on embroidered clothing as a strong element of nationhood and belief, and I did learn quite a lot about the different ways that embroidery interprets varied signs for different purposes. There is a lot more to Ukrainian embroidery than just these four symbols - there is really no mention of florals or free-style embroidery, and just a passing reference to the ubiquitous tree of life, for example. But still an interesting read. 


Thursday, May 19, 2022

International Vyshyvanka Day!

 Happy International Vyshyvanka Day! 

The third Thursday of May is International Vyshyvanka Day. The idea of Vyshyvanka Day was suggested in 2006 by Lesia Voroniuk, a student at a Ukrainian university. The day of celebration was intentionally set on a weekday and not in the weekend to emphasise that the vyshyvanka is "a component of the life and culture of Ukrainians, and not an ancient artifact" (Wikipedia)

It's a day to wear one's Vyshyvanka (embroidered blouse) and represent Ukrainian tradition. I pulled out my vyshyvanka, a store bought one -- someday I will make my own. Could that be why I've been reading so many books on traditional Ukrainian embroidery? Why yes. I decided to wear this with one of my favourite new skirts & masks. 


Maybe next year I'll be wearing a Me Made!

Tuesday, May 17, 2022

A Honey Bloom Butterick Dress


For my latest Spring/Summer Fabricville project, I decided to make a dress. Shocking, I know ;) I found this glorious cotton, Honey Bloom, designed by Laura C Mayer for FIGO Northcott fabric, on the Fabricville website and just couldn't resist. It says it's perfect for quilting, home decor, or children's garments, but I also thought it would be perfect for an adult garment! 

I matched it up with Butterick 6725, as I was looking for a dress with a straight silhouette that would use this fabric well. With a crisp quilting cotton, I always prefer a design that has no gathering or drape. A sleek pattern takes advantage of the qualities of a cotton and so this dress, with panels and a slight A-line skirt, seemed perfect. I made View A with the sleeves from View B.

It was a very easy pattern to put together! There are princess seams in the front, and the centre panel is cut as two pieces as well, because there is supposed to be topstitching along all those seams. However, I didn't use the topstitching in the end -- on my samples, neither the black or green topstitching I tried were visible from more than a few inches away so there was not really a point on this busy print. I wish I would have figured that out before cutting the pieces out, as I would have cut the centre panel on the fold otherwise. But I think it still worked out. Also, I'm relieved that I got the patch pockets placed with the print near to matching as well.

The cutting was the longest and most intimidating part. When I laid the fabric out I realized that the print was both large and regular. I wasn't too worried about matching up the print in the sense of having a flower carry across a seam, necessarily, but I did want to be sure that the pattern was balanced across the whole of the dress and that the clear horizontal repeat was not askew. 

It took a fair bit of placement and moving pattern pieces around, but I got to it in the end. The bust point isn't marked (it's on the seam) so I had to figure that out and be sure a giant flower didn't end there - that was my starting point. Then I basically used the hemline as the plumb line to be sure each piece was sitting on the same plane. It worked well, and the larger flowers are all in line around the whole of the dress, nobody is off balance or drooping, whew! 

The adjustments that I made were mainly my usual ones for a petite person. I cut 14 at the neckline and shoulder, and 16 at bust, grading to 18 at hip. I shortened it by an inch above the waist, and raised the bottom of the neckline slit by an inch. I often raise neckline features, since I am shorter between shoulder and bust. I made View A but used the sleeves from View B. The only change to the sleeve was to cut 14 at the shoulder cap but 16 at the underarm seam. That small adjustment usually works for me. And I added on 2" to the View A hem, as I prefer a slightly longer skirt - my legs are too short to have hems much above my knee, as it makes me a bit uncomfortable! 

This was a fun project, and I really like the silhouette. The fabric is colourful and fun - I love a black floral. It was a pleasure to sew, taking pressing and manipulation well, and it is heavy enough to wear without worrying about see-through. Also, I've worn it twice now, and haven't had any bad creasing to iron out. I'm never one to shy away from using quilting cotton in garments. Just avoid anything fussy or gathered. As long as you remember to use the properties of a fabric to its best effect, you can make nearly anything work for you. 

Sunday, May 15, 2022

Weekend Review: The Art of Ukrainian Embroidery: techniques and technology


The Art of Ukrainian Embroidery / Olena Kulynych-Stakhurska
Lviv: Misioner, c1996.
155 p.

I found this book via Interlibrary Loan - such a privilege to have access to it, as this book is nearly impossible to get one's hands on otherwise. As it is, I was only able to find it at one location in all of Canada. 

That limited access is really too bad, as this is an excellent resource book. The author has an interesting foreword, in which she explains why she thought that travelling around Ukraine to many villages and towns, talking to the remaining experts in embroidery (this was during and just after Ukraine's experience under the Soviet government) was so important. She believes that "the art of embroidery...reflects the spirit of the Ukrainian nation. Popular wisdom filled its work with innermost feelings of the soul, a deep philosophical idea that through symbols imprinted itself on the cloth." 

She also says that there are more than 100 distinct stitches in Ukrainian embroidery but that many of them are being lost to the easier and faster cross-stitch (she's not a fan). She feels that the beauty and soul of Ukrainian embroidery are entangled with these traditions and so doesn't want them to disappear. In the intro, she explains that she has been working on this project for over 25 years, and that the "techniques and technology" of the title are based on her own collections, museum collections, and the  ethnographic work she did with individuals across Ukraine. It's a book intended as a record to aid researchers, and I think it accomplished its aims very successfully.

The book itself is structured stitch by stitch, with a clear diagram of the stitch, followed by the name of the stitch -- often different depending on what part of Ukraine you're in, and those names and variations are all noted as well. Then there are basic instructions on how to complete it - I think that if you are already an embroiderer you'll have much more luck deciphering the instructions, but then I always find written descriptions of stitching harder to figure out that someone just showing me :) There are many clear images of the stitch as worked, too.


There are 155 stitches here, ranging from simple ones like backstitch, running stitch, stem stitch or chain stitch to drawn work stitches (in the style known as Merezhka) There are many variations and unusual techniques included. Interspersed are full page colour plates of examples from her collections; clothing, household linens, both overviews and details. And it's published as a fully bilingual edition, with Ukrainian and English text side-by-side.

The book is thorough and inspiring. It's really a must have if you are interested in the history of Ukrainian stitching. I'll be looking for my own copy, and hope that I will someday come across one! 


Friday, May 13, 2022

Bunting for Ukraine

I took a break from garment making after my last few projects in favour of some home decor of a sort. I had some blue and yellow cotton left over from my recent spurt of mask making, and my husband suggested that I could make bunting to hang on our porch for the summer. I was immediately taken with this idea and measured it out to see if it would work. 


It did! I had just enough to make two small strings of 7 bunting flags each, just the right size to hang in our small porch windows. I also had two packages of wide double fold bias binding in blue -- I always pick up bias binding when I see it at the thrift store, and I was lucky to find enough of just the right colour to easily attach my bunting flags to. 

I estimated the size of the bunting by looking online for examples. I went with a finished size of 7" across the top and a length down the centre of 7.5". This was easy to sketch out, giving myself a 1/2" seam allowance at the top edge and 1/4" on the sides. I sewed two triangles to each other, being sure to take one horizontal stitch at the point as I was turning up to the other side, which usually makes getting a clean point a bit easier. 

I then pinked the edges and turned the bunting inside out, pushing out the point carefully. Once I pressed them the shape was quite nicely triangular. Then I just pinned them 2" apart, between the folds of the bias binding and topstitched along the whole length. Just had to be a little careful that the edges weren't slipping as I sewed, but it wasn't hard at all. 

I am really happy with this bright bunting that is just the right size for the space. I think it's important to not "get tired" of what is happening in Ukraine, and to keep focus and attention on the situation. So having my bunting up will show my support for Ukraine, and keep it from disappearing from public consciousness, I hope. 


Tuesday, May 10, 2022

My Kyiv Jacket: Jalie Tania in blue and gold

Well, I made it to Round 3 of the Pattern Review Sewing Bee! This is farthest I've ever gone in this challenge, and I'm enjoying it so far. The challenge set was to make the Jalie Tania coatigan, and make it your own. I've made the Tania previously, so didn't have to do much fitting or tracing, which was a definite benefit as the week-long sewing challenge fell on a week in which I was very busy and short of time. 

I ran a number of ideas through as possibilities, until I finally decided on making a lightweight coatigan from some navy and black wool challis in my stash. I was taking Kyiv as my inspiration: it is sometimes known as the City of the Golden Domes, and so instead of the bright yellow and blue of the Ukrainian flag, I went with navy and gold in a nod to both. 

I cut my navy wool, and the gold lining I had in mind. I was planning on doing some embroidery and/or stencilling in gold, but when I was making samples I just couldn't get it right. It all looked too "homemade" and not what I was going for. So I decided to make a change.


 I knew I had some gold-toned fabrics in my stash so got them all out and changed the lower part of the Tania. I decided on some bronzey stretch fabric so had to interface it with lightweight interfacing to keep it from stretching out. Matching up those "V"s meant some fussy hand basting to begin with, something I experienced on my last go-round when I was matching up piping points. This bronzey gold seemed to go nicely with both the navy and the more golden lining. 


But I still didn't think it was enough, it needed a little more design. So I made the interior of the collar also in bronze, to highlight it when the collar is turned down. And more importantly, I decided to make a slashed sleeve, both to show off more gold and as a tribute to the church domes that were my inspiration - the oldest churches in Kyiv were built in 1037 and kept getting added to up to the 1850s and beyond, so that stretch of years includes the European fashion of slashed sleeves and doublets somewhere in there ;) 


 I used a strip of 2.5" wide gold fabric, attached to the sleeve which was split down the middle (it's a symmetrical sleeve) with a 1/4" seam, and then folded back together with edges touching. It's stitched down by about 3" at top and bottom, while the middle is left to open and reveal the gold insert. 

This wasn't too hard to make -- the pattern is quite straightforward. I didn't have many fitting adjustments to make, both because I am a fan of the boxy shape, and because I've made it before. But all the additions and changes did mean I had to start over a bit and think about how to put it all together most efficiently. 

While I don't think this was really out-of-the-box or terribly unique (no real changes to style lines or overall appearance) I enjoyed making it. I was pleased with my inspiration, and was also happy to have been able to once again make the entire project out of stash materials. I knew that gold lining would have a perfect project some day!


Sunday, May 8, 2022

Weekend Review: 3 Cross Stitch Collections


Today's review is a brief one, even if it does cover 3 different books. These are ebooks that I purchased from BoutiqueHobby on Etsy, a store based in Ukraine that sells primarily older ebooks like this. They are very affordable, and a great way to support Ukrainian sellers directly. If you're not into cross-stitch, you can also find many older sewing and fibre arts books in her store as well! 

But now for a quick survey of these three titles. I bought them all and have enjoyed looking through them, even though I don't do cross stitch myself. (yet, anyhow). I am thinking of printing a couple of the borders and using them in my bullet journal though! ;) 

Each book is a collection of various charted patterns, not much commentary or text in any of the books. They are pattern books that share a variety of the styles of charted embroidery from across the different regional styles of Ukraine, even if they aren't always notated with that information. You can see the different geometric and floral styles on the covers, and the various colour schemes as well. 

250 Ukrainian Ornaments is the one with the largest, clearest charts, and some of them even include thread guides with DMC & Anchor equivalencies. There are many full page charts and lots of options for design choices for home decor or clothing. It's 144 pages, and has a mix of traditional and some more modern designs as well. Here's an small example of part of one I really loved.


Ukrainian Vyshyvanka is what it states: a collection of designs for shirts. This means that the designs include collar and cuff sized charts alongside the ones for the front of a top, or they may have a set of small motifs that are often placed singly on sleeves as well. 

I liked how this collection has variety - from quite simple geometrics to elaborate all over designs and busy florals, there is a lot to choose from. Many of them also include thread guides. This book also includes a few small inset photos alongside some of the charts so that you can see how the pattern looks when it is made up. This is quite helpful, and it shows both women's and men's shirts. For example:


There are even some suggestions for non-traditional clothing to embroider on - one example is a longer dress, another is a halter top and high-waisted skirt. I think that it's interesting to see these more traditional motifs used in new and current ways, as well as for the traditional vyshyvanka. 

And the final title in the trio, 3000 Ukrainian Old Patterns for Cross Stitching, also gives you a wide variety of choice in its charts and designs. This one is a bit less glossy; it's more like someone's scrapbook of patterns, in a way. There are different levels of clarity to the images and some are clearly from magazines, with a real variety of styles and colours in particular. There are some more unusual designs here due to the vast number of small motifs and borders included. Although it's more of a hodge-podge of design, I enjoyed looking through it and seeing the patterns that were in circulation in the past. This magazine image has a chart behind the image of a girl wearing a blouse with the motifs on it; you'd have to be an accomplished stitcher to figure out all of the chart and get the results, I think! (you can see a lot more of the chart in the book) 


It was fun to note some more unusual popular designs that aren't traditional but were included as things found in use at some point - there was a full page horse head medallion (?) and my favourite, a little row of cats that was tucked onto the edge of one page.

If you are into cross stitch or even just into looking at these kind of cool charted designs for other purposes, I recommend picking up these books. They are useful, full of great images, and you'll be directly supporting a Ukrainian crafter. Win win! And, as I mentioned earlier, this shop also has a bunch of historical Victorian, Edwardian and even 30s/40s sewing books, as well as a collection of macrame, tatting, drawn work and other fibre arts books. Lots to explore.


Friday, May 6, 2022

Literary Sewing Circle: Finale & Project Round Up


Today is already our final day of the Literary Sewing Circle focusing on Elizabeth C. Bunce's Premeditated Myrtle!

I hope you've had the chance to read the book, and both the first and second inspiration posts, and are getting lots of ideas for a project of your own. 

The project linkup will be added to the bottom of this post: as soon as you are done your project, just pop a link to your post into the linkup and we will all be able to visit your blog/instagram etc. and explore your creation -- remember, it can be sewn, or knitted, crocheted, embroidered... any textile art that you practice.


I shared a lot of my thoughts on the book in our earlier book talk post, and I reviewed this novel on my book blog when I first read it. You can explore those for some of my thoughts; today I'll share an overview of my impressions of this novel. I hope you will too!

I really enjoyed this book each time I read it. The clever chapter headings and footnotes, the variety of characters, the well plotted mystery, and the Victorian setting were all pluses for me.  I found Myrtle reminiscent of some of my other favourite girl sleuths like Flavia de Luce or even Harriet the Spy - especially in the relationship between Myrtle and Miss Judson, one of the most pleasing bits of the series for me. 

The story held up to rereadings, as it was both clever and full of detail that could be enjoyed on the second go-round. I appreciated the attention given to the setting and domestic details, which were added in so naturally but grounded the story in its place. Seeing Myrtle's reactions to clues and facts and other characters was also richer the second time, when you know what's going to happen and can slow down a little and take in all the elements of the narrative. 

Of course I loved the clothing and household descriptions; as one of our participants mentioned previously, the clothing adds to the development of each character when you notice that what they are wearing expresses them in varied ways. 

Also, the emotional element of Myrtle's connection to Miss Judson as a mother figure is touching. I loved the addition of Miss Judson's background, which adds depth and nuance to her as a person and to her role in the family. And Myrtle's much hoped-for romance between Miss Judson and her father is a great touch. I have enjoyed the additional books in the series and hope some of you will too!


Questions for you all:

Did you enjoy this mystery for younger readers? Are you intrigued to follow up with some of the other titles in this series? (heads up, book two has some sewing related content as well...) Did you connect with Myrtle's character? How does she compare, for you, to other young female sleuths?


Please share your thoughts on the book, its themes, characters, or anything you noted about it -- either in the comments here or on our first Book Talk post, or on your own blog with a link to your longer thoughts in the comments so we can find it. I love to talk about the experience of reading so feel free to comment no matter when you're reading this post; if you've read this I'd love to hear your thoughts.


What project have you made, inspired by your reading of Premeditated Myrtle? Share a link to your project on this post as soon as you're done! The linkup will be live until May 31 --  you have another 3 1/2 weeks of sewing time to finish and share.